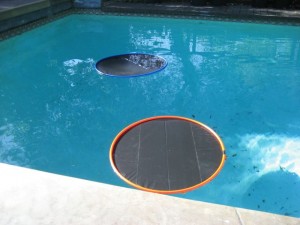
For the past year and a half we’ve been heating our pool with a solar water heater. It pumps the water to the roof, where it runs through black tubes, which absorb as much warmth from the sunlight as possible. This solution has raised our pool temp by about 8ËšF. But, it does nothing to prevent evaporation. In fact, as the pool warms up, the water molecules have more energy and evaporate just a little faster. I found a solution in Make Magazine’s article on how to make Lily Pad Warmers. What I liked about the Lily Pads is that they don’t need to be removed to take a dip in the pool. Sure, they don’t cover the entire pool, but the do cover some of it, and that’s better than nothing. Apparently they can be used to fulfill a requirement some drought-riden areas have about covering pools to prevent water loss.
Here’s what I did to make some Lily Pads for our pool… I purchased four dozen hula hoops from an online vendor. Shop around to find a great deal, but watch out for shipping! As for tools, I started with a soldering iron, a utility blade, and some electrical tape. I ended up using another house hold tool, but you’ll see that soon enough.
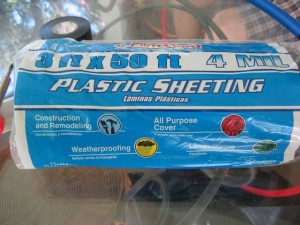 I bought 3 rolls of 4mil (less ambiguously: 4 thousands of an inch) plastic sheeting. I was hoping that the 36″ wide plastic would perfectly cover the 36″ hula hoops, but it ended up being just a tad too narrow, so we had to squeeze the hoops together ever so slightly, resulting in ovals.
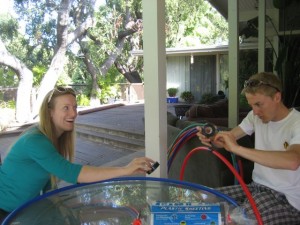 It always helps to grab a couple of friends that don’t mind working outside next to the pool on a beautiful day. Plying them with beer helps.
We pre-cut our plastic sheeting to ~40″ x 36″. We found it was really easy to cut the plastic with just a sharp razor blade. We put some tape on a stick so we could accurately cut out the plastic sheets each time.
 Find the seam in the hula hoop. We need to seal it so it doesn’t take on water. We just wrapped over the staples and the gap in the hula tubing with electrical tape. I’m sure silicone would be just as effective. This will hopefully keep the water from filling the hula hoop and sinking our lilypads.
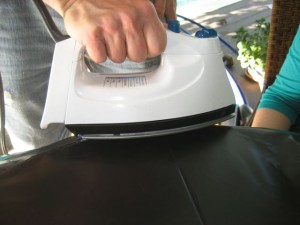 The next thing to do is to attach the plastic sheeting to the hula hoop. It’s easy to melt the plastics together, just to get them to stick a little bit. At first we used the side of the soldering iron to melt things together, but we found that it took too long. We tried a cheap clothing iron, and it was much faster. One person held the plastic taut while the other pressed the iron onto the plastic and held it for a second and a half. If we held it too long it would leave some holes in the plastic, but eventually you’ll find the right rhythm.
Then it was just a matter of using the razor to cut off the excess plastic. The plastic cut smoothly all the way around with our fresh razor. We then used that razor to slice some thin holes in the plastic sheeting in the middle of the lily pad. This keeps air from getting trapped underneath the plastic. If the plastic is touching the water it will do a much better job of transferring the warmth from the sunlight into the pool.
Finally, we just put the lily pad in the pool. Just keep cranking them out until you have as many as you think you need for the pool. It’s not an exact science, but every lily pad helps, as long as they don’t keep you from getting in the pool. If I find my thermometer I’ll report back on how warm the pool is getting.
Here’s a youtube video I made about how I did this process. Enjoy!
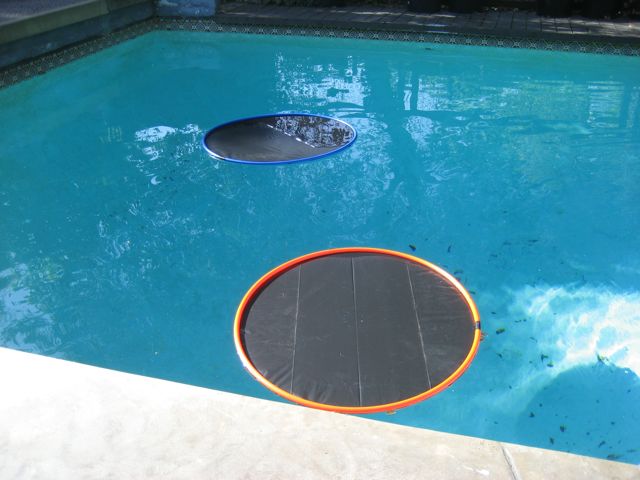


How did the lily pad pool warmers work? We live in the midwest and I am hoping to come up a more effective way of heating up our above ground pool. Thanks!
It’d be hard to quantify the effect of the lily pad pool warmers without more rigorous experimentation. But, they do a great job of preventing evaporative losses and absorbing sunlight. They don’t cover all of the pool, but they are easy to push around for that spontaneous cannonball on a hot summer’s day. I say “Go for it!” Good luck!
Can you use a regular clothing iron? or should you use a cheap iron so you do not destroy your good iron?
Sometimes the melted plastic did stick to the iron, but it wasn’t too hard to scrape off. Most irons have a teflon coating on the bottom, so you’d want to be a little bit careful of scraping that off. I wouldn’t use a family heirloom iron though.
Do you think strategically placed adhesive would have worked as well as the melting plastic option? Also, what was the temp before and after?
I used a glue gun and it worked great! Thanks!
Did you find your thermometer? I’d love to hear how warm the pool gets! Thanks:)
use parchmin paper under your iron
sounds neat. covers also reduce chlorine and water evaporation, which saves money
I love the idea of Lily Pad Pool Warmers! It’s such a clever way to enhance outdoor pool experiences. Can’t wait to see how they work in different climates. Thanks for sharing this innovative solution, Daniel!